My Elli got onto the whole Frozen bandwagon a wee bit late. Like… almost a year late. That’s my fault. She just started to be interested in watching movies and she’s not into princesses so why bother… well then my Mother got the movie and my Elli… or rather Elsa as she wants to be called is just another Frozen-Crazed-Toddler. She just wishes so badly she could create ice and snow. She also screams “let it go” every time she undresses…
I decided to make her an Elsa cape. Well, she and I had a small misunderstanding about this cape. She thought it would give her magic like Elsa and she then could make Autumn in Minnesota turn into Winter by wearing her cape and stomping her foot. It didn’t happen. Instead we had an hour long tantrum. Then she realized she could un-button her cape and it would blow away in the wind (just like in the movie). I was SO thankful it was windy this morning. Now she loves it and has showed her cape off to the other little girls around the neighborhood; she is quite proud of her sparkly, snowflake Elsa cape – even without it’s powers. Phew!
Want to make an easy one too? The great thing about this cape is that it can be any cape you want. It can be an Elsa cape, a vampire cape, or a Superman cape! And it’s not super complicated. Let me show you.

She looks happy, right? Ok, so let’s begin!

- Cotton Fabric. I have snowflake cotton with sparkles from Brooks Fabrics in Bountiful, Utah. Everywhere is sold out of Frozen fabric. But the snowflakes work awesome.
- Tape measure
- Pins
- Scissors
- Iron
- Sewing machine
- Serger (optional)
- Snap Pliers (optional)
Got it all? Ok, awesome. We are going to first cut our fabric. I cut my piece to be 44″ x 34″ because I wanted it to be long like Elsa’s in the movie. You can make it whatever size you want. I basically just cut my fabric as long as I wanted by holding it up to Elli and then left it as wide as when it comes off the bolt. You will have two edges that aren’t cut. Those are called the salvages. They won’t fray. Easy enough.

Iron if it’s wrinkly. Now I serged the two sides that were raw edges. I left the selvage sides alone. Remember that when you serge you keep serging a tail on the end. You will need the extra thread to tie off to stop it from unraveling. If you don’t have a serger just fold over twice. Iron. Sew.
Now you have a large piece of fabric with two sides serged and two salvages?


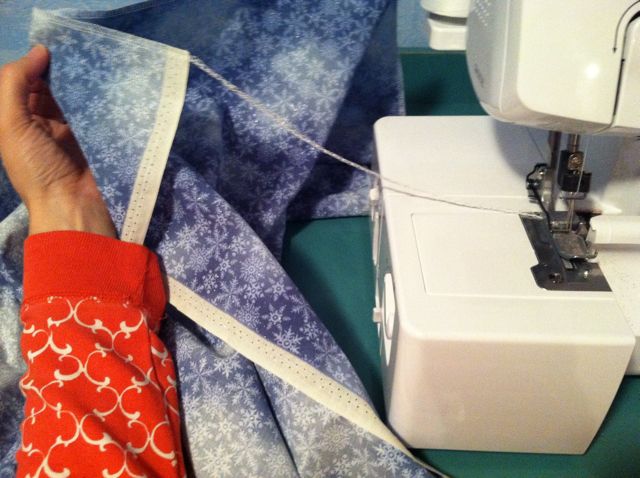
Sweet. Ok, now I took the 34″ side (one of the salvage edges) and, wrong side up (the right side of the fabric is the printed side and the wrong side of fabric is the other), folded over the corners into right angles. I ironed them down. Then I folded down the salvage edge a few inches and ironed. Then I pinned. You are making a casting for a ribbon to go into if you want to have the cape tie around their neck.

Sew. I started at the corner of my square that was created by the salvage. Remember to start with your pressure foot down and your needle down. Don’t forget to backstitch a few times!

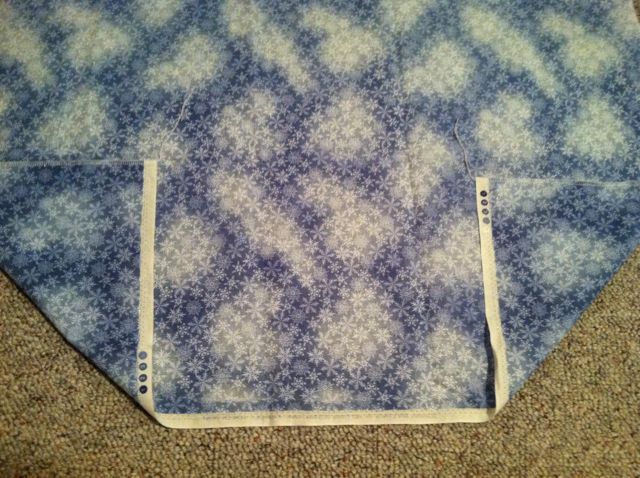
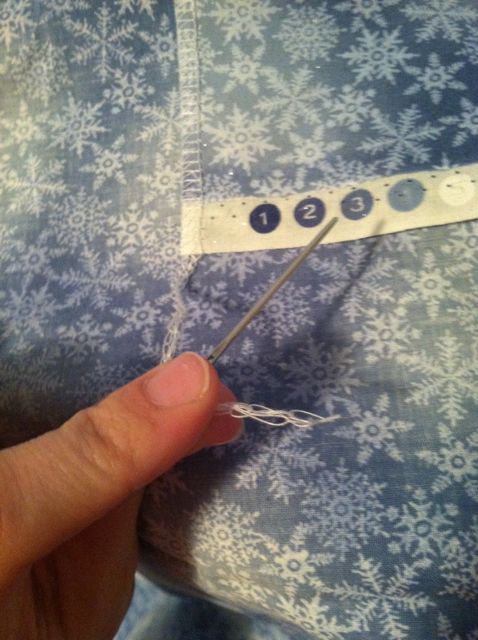
Now take a big fatty needle and if you serged the sides tuck your ends in.

You should have something that looks like this:
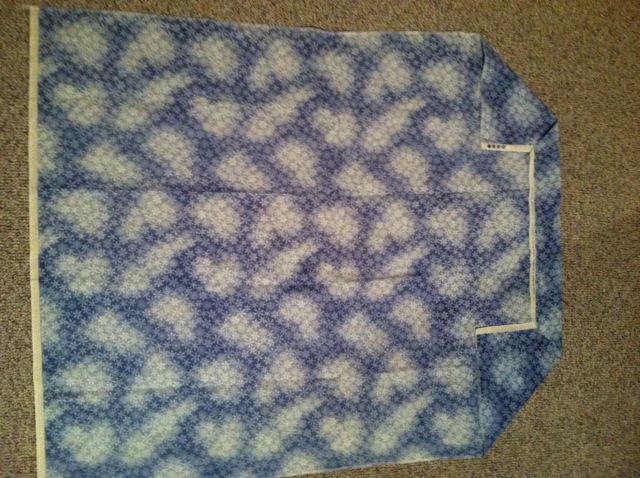
Now fold up the bottom an inch or two… I don’t enjoy measuring.
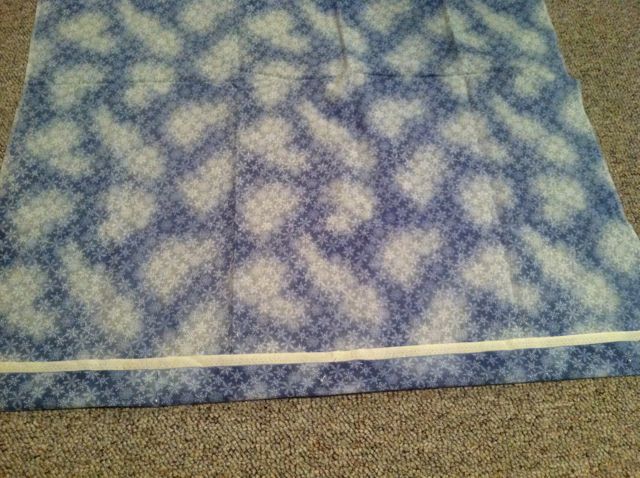
Iron. Pin. Sew.

Now… you’re done if you are going to use ribbon to tie your cape around your kiddos neck. Great job. I’m sure they will love it. If you want to do a snap like I did… continue. Grab your snap pliers. It should look something like the thing below.

Now, basically just follow your directions to insert your snaps. I messed up even after calling my sister and reading my directions. I would recommend watching YouTube. If you mess up… do this!

Grab something hot and melt the middle. Once you melt the middle of the snap it will come apart. Easy! I had my husband do it. He took a lighter and warmed a small screw driver up and melted the middle. I pulled the snap apart and started over. Ok, so if you did the snaps right you should have something that looks like this!


Great job! It was my first time using snaps. And now you are done! It’s pretty easy! It’s pretty versable too. Halloween is coming up. Need any capes for costumes?
Good luck. I know you can do it! If you have questions let me know!
A presto!
Jacqueline


2 thoughts on “The Super-Duper Easy Cape Tutorial”